
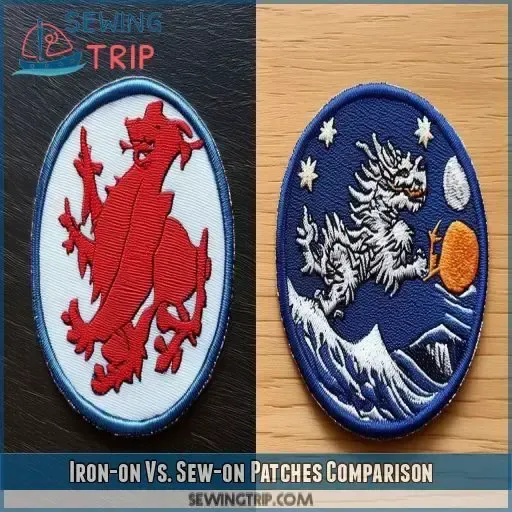
Iron-On and Sew-On Patches offer a quick way to tell your story through fabric, making personal style accessible and expressive. One type uses a heat-activated adhesive, while the other requires stitching to secure the design. Choosing the right option depends on size, color, backing, and fabric compatibility for durable results. This guide provides practical tips for choosing, applying, and caring for patches in everyday wear. From denim to backpacks and thrift-store finds, you will discover what works best for your project.
Beyond the standard terms, these are often described as iron-on patches or sew-on patches, depending on how they attach. They can be heat-activated appliques or stitched badges, emphasizing different application methods. For DIY readers, how to apply iron-on patches and patch sewing tips can guide you from prep to finish. As you plan, keep patch care and maintenance in mind to extend wear and color. With these terms in mind, you will navigate fabric upgrades on jackets, bags, hats, and more with confidence.
Frequently Asked Questions
What are the main differences between iron-on patches and sew-on patches?
Iron-On patches use a heat-activated adhesive backing to bond with fabric, delivering a fast, convenient option ideal for stable fabrics like cotton, denim, and canvas. Sew-On patches require stitching and are typically more durable, washer/dryer friendly, and better for irregular shapes or fabrics where heat could cause buckling.
How to apply iron-on patches for best results (how to apply iron-on patches)?
Prep the surface, position the patch, cover with parchment or a clean cloth, set medium heat with no steam, press firmly for 15–30 seconds, check the edges, reapply if needed, and let the patch cool completely. For curved areas or delicate fabrics, avoid excessive heat and consider sewing for security.
What are the best patch sewing tips for sew-on patches?
Thread a needle with matching thread, align the patch, and stitch around the edge with small, even stitches (running or whip stitches). Knot securely on the underside, reinforce with a second pass if desired, trim excess threads, and consider a second outer row for extra durability.
Which fabrics and patch sizes work best with iron-on patches vs sew-on patches?
Iron-on patches work well on stable fabrics like cotton, denim, and canvas and are best for larger, less stretchy areas. Sew-on patches are safer for very stretchy or delicate fabrics and situations where heat could cause damage; choose patch size to cover wear or make a bold design statement.
How should I care for patches after washing (patch care and maintenance)?
Wash inside-out on a gentle cold cycle, avoid high-heat drying, air-dry when possible, and inspect patches after several washes. If an iron-on patch loosens, re-press; if a sew-on patch loosens, re-stitch as needed. Avoid direct heat on iron-on patches after washing.
What common issues occur with iron-on and sew-on patches and how can I troubleshoot them?
Common issues include edges lifting, patch curling, and washing-related loosening. Solutions include applying extra heat and pressure or sewing around edges for lift, using a barrier cloth and lighter heat to flatten curls, and testing heat settings or opting for sew-on patches if heat challenges persist.
| Topic | Key Points |
|---|---|
| What are Iron-On Patches and Sew-On Patches? | Iron-On patches use heat-activated adhesive for fast bonding (best on stable fabrics); Sew-On patches require stitching and are typically more durable and washer/dryer friendly, suitable for irregular shapes or fabrics where heat may cause buckling. |
| Choosing the Right Patch: Size, Color, and Backing | Match patch size and color to the garment. Larger patches cover stains or serve as bold statements. Iron-On backs work well on cotton, canvas, and denim; stretch fabrics (like jersey) may resist; for delicate fabrics (silk/satin), Sew-On is often safer. |
| Materials and Tools You’ll Need | Iron-On: iron, ironing board, parchment or cloth, medium heat (no steam). Sew-On: needle, matching thread, scissors; optional seam ripper, fabric scissors, thimble. |
| The Step-By-Step: How to Apply Iron-On Patches | Prep surface; position and pin; cover with parchment or cloth; set medium heat (no steam); press 15–30 seconds; reheat/press edges as needed; cool completely; finish with a second pass if needed. |
| The Step-By-Step: How to Sew-On Patches | Thread needle; align patch; stitch around edge with running/whip stitch; knot and reinforce; trim threads; optional second row of stitches for durability. |
| Patch Care and Maintenance | Wash inside out on gentle cold cycle; air-dry if possible; inspect for loose edges and re-press/re-stitch as needed; avoid direct ironing over patches after washing. |
| Fabric Compatibility and Common Pitfalls | Iron-On best on stable fabrics with minimal stretch; very stretchy or delicate fabrics may require Sew-On. Be cautious near seams or high-movement areas; leather, vinyl, or suede may be better with Sew-On or fabric adhesive. |
| Troubleshooting: When Patches Don’t Stick or Stay Put | Edges lifting: reheat and apply pressure or sew edges. Curling: lower heat and use barrier cloth; longer press on thick patches. Washing issues: adjust heat or consider sewing or different backing. |
| Creative Uses and Design Ideas | Patches aren’t limited to jackets—use on tote bags, jeans, hats, backpacks, sneakers; create themed clusters or mix with embroidery for personal storytelling. |
| Advanced Tips and Tricks | Test on scrap fabric to dial in heat; patch curved surfaces with curved shapes or multiple small patches; for heavier patches, consider a light fabric adhesive plus Sew-On borders; keep scissors handy for trimming. |
Summary
Iron-On and Sew-On Patches offer versatile, accessible ways to refresh and personalize clothing and accessories. By understanding the strengths and limitations of each method, you can choose the right approach for your fabric, design, and lifestyle. Prepare, test, and care for patches to maximize durability and appearance, transforming everyday items into bold, expressive pieces that celebrate style and craftsmanship. Whether you’re after a quick update with iron-on patches or a long-lasting bond with sew-on patches, your patch project is limited only by imagination and technique.