
The custom patch production process shapes every stitch, guiding brands from the initial concept through design refinements to durable, eye-catching emblems that tell a story on fabric and stay vibrant after countless wears and washes, regardless of whether the patches are destined for athletic jerseys, corporate merch, or collectible ephemera. This journey blends creative exploration with practical engineering, balancing visual fidelity, fabric behavior, thread tension, color management, and production realities so that what begins as a sketch ends as a reliable accessory that enhances identity across diverse garments and environments. From selecting substrates to choosing the right backing, the choices made in this stage influence edge finish, colorfastness, and comfort, setting up the patch for a robust, repeatable workflow across different garment types and care cycles while providing clear criteria for cost and lead time. The emphasis on quality from the outset reduces surprises during production, helps maintain consistent sizing, and ensures that the end products align with brand standards and customer expectations, enabling smoother approvals, fewer revisions, and better supplier collaboration. By understanding this framework, teams can optimize material sourcing, tooling, and workflow timing, transforming a concept into a scalable, high-value patch that performs as intended under real-world conditions and supports reliable inventory planning.
From an LSI perspective, you can frame this topic using alternate terms that capture the same core ideas. For example, you can reference custom patch manufacturing, patch embroidery process, and patch production steps to connect with related searches. Other signals like material selection for patches and quality control for patches further reinforce the topic’s relevance to durability, appearance, and brand consistency. Collectively, these terms map to practical actions such as design validation, digitization, backing choices, and finishing techniques that ensure a scalable, reproducible patch lifecycle. Using this approach helps readers and search engines alike understand the patch lifecycle beyond a single descriptor while preserving clarity and authority.
Understanding the Custom Patch Production Process: From Concept to Creation
The journey of a high-quality patch begins with a clear vision, and the custom patch production process guides it from idea to finished emblem. By mapping ideation, design, material selection, and embroidery decisions into a cohesive workflow, brands ensure consistency across runs and reduce downstream revisions. This overview emphasizes that every stitch is rooted in a well-planned production path, tying together the disciplines of custom patch manufacturing and brand branding.
From concept to delivery, the lifecycle covers ideation, digitization, prototyping, production steps, and final quality checks. Understanding how the patch production steps interlock helps teams communicate with suppliers, set realistic lead times, and establish appropriate quality control for patches. When properly sequenced, the process yields patches that align with brand standards and withstand regular wear and washing.
Material Selection for Patches: Balancing Durability, Comfort, and Brand Appeal
Material selection for patches determines how well a patch performs in real-world conditions. Substrates like twill, felt, or fabric influence drape and stiffness, while backings (iron-on, Velcro, or press-on) affect application and longevity. Border finishes such as merrow edges or satin stitching complete the aesthetic and contribute to edge stability. This decision set is foundational to the custom patch manufacturing workflow because material choices ripple through color, stitching, and washfastness.
Choosing materials should consider use-case, care instructions, and cost. Outdoor gear may require UV-fast threads and fade-resistant inks; school uniforms demand durable fabrics; promotional runs prioritize cost efficiency without sacrificing print quality. Thoughtful material selection for patches balances look and practicality, feeding into the broader patch production steps and the final user experience.
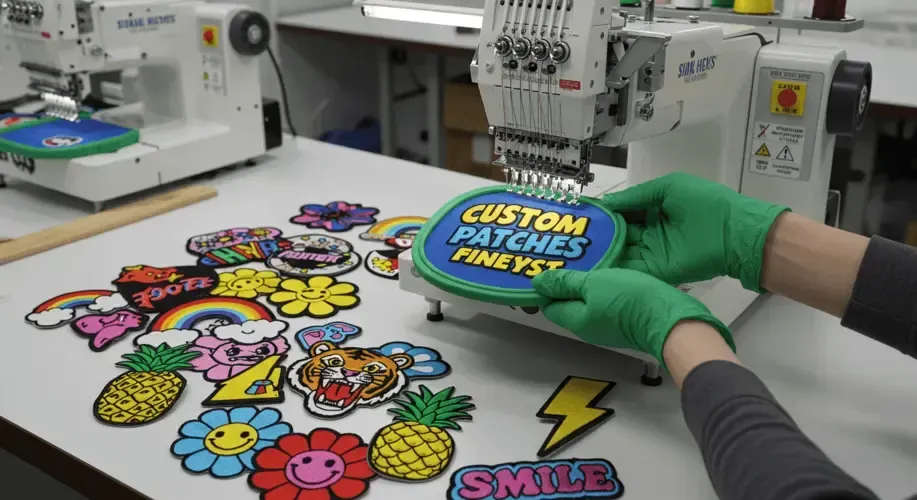
The Patch Embroidery Process: From Digitizing to Edge Finishing
The patch embroidery process sits at the center of manufacturing. It begins with digitizing and prepping the design, translating artwork into machine-ready instructions with stitch types, density, and color stops. Hoop setup stabilizes the fabric, ensuring consistent stitch placement across the patch and across batches.
As stitching progresses, density control, underlay, and color management determine legibility and durability. Edge finishing—whether merrow, satin, or heat-cut—defines the final silhouette. A well-executed patch embroidery process improves colorfastness and wear resistance, which is especially important for patches on frequent-wash garments and active use.
From Prototyping to Production: Ensuring Color Accuracy and Fit
Prototyping serves as the testbed for the patch concept. A single patch sample enables evaluation of color accuracy, stitch quality, edge balance, and overall harmony before committing to a full run. If colors drift in the sample, adjustments to thread colors or underlay can dramatically improve alignment with the brand vision.
Once the design proves out, the patch production steps escalate to production planning and execution—pre-production planning, material procurement, digitized file validation, and the actual production run. Ongoing quality checks at checkpoints ensure the final patches meet tolerance bands and branding standards, underscoring the importance of thorough prototyping in the patch production process.
Quality Control for Patches: Key Checks and Best Practices
Quality control for patches is a continuous discipline, starting in the design phase and extending through the entire patch production cycle. Essential checks include color accuracy, stitch density, edge integrity, backing adhesion, and dimensional fidelity. Implementing these checks early reduces rework and preserves branding consistency across batches.
Establishing QC benchmarks, leveraging supplier quality programs, and maintaining traceability enable reliable partnerships with manufacturers. Ongoing QC supports a culture of continuous improvement and helps ensure that patches remain durable, visually accurate, and aligned with care instructions throughout the product life cycle.
Scaling Up: Strategies for Large-Volume Patch Production
When demand grows, scaling up requires robust communication between design teams and manufacturing partners, plus accurate forecasting and lead-time planning. Large-volume runs rely on the same core patch production steps, but with automation, standardized testing, and tighter capacity management to sustain quality and on-time delivery.
To maintain brand integrity at scale, establish predictable workflows, invest in reliable stabilizers and backing options, and develop clear specifications. The aim is to preserve the original concept during thousands of patches while achieving cost efficiency and faster turnaround, a core advantage of modern custom patch manufacturing.
Frequently Asked Questions
What is the custom patch production process and how does it influence patch quality from concept to delivery?
The custom patch production process begins with ideation and concept, then moves to design and digitization, material selection for patches, prototyping, the patch embroidery process, production steps, and strict quality control for patches before delivery. Each stage affects feasibility, aesthetics, durability, and branding consistency—clear goals in ideation guide choices in patch manufacturing and embroidery techniques, while a careful prototype validates color, density, and edge finishing.
What are the essential patch production steps to ensure color accuracy and durability in custom patch manufacturing?
Key patch production steps to ensure color accuracy and durability include pre-production planning, material procurement, digitized file validation, the production run, post-production finishing, and ongoing quality control for patches. A strong focus on color management and standardized procedures reduces variance across batches and speeds setup for mass production.
How does material selection for patches impact performance in the patch embroidery process and the final look?
Material selection for patches determines substrate durability, backing adhesion, and border finish, which in turn affects the patch embroidery process and final look. Choosing the right combination—twill, felt, or fabric; iron-on or press-on backing; satin, merrow, or heat-cut borders—balances aesthetics, comfort, and wear performance, especially for outdoor or wash-sensitive applications.
What quality control for patches should be built into the custom patch production process to prevent rework?
Quality control for patches should be built into every stage: color accuracy and consistency, stitch density and edge integrity, backing adhesion, wear tests, dimensional accuracy, and packaging/labeling checks. Establishing benchmarks early and performing ongoing QC helps catch issues before shipping and supports reliable custom patch manufacturing partnerships.
Why are digitization and color management important in the patch embroidery process for custom patches?
Digitization and color management are central to the patch embroidery process. Converting designs into embroidery-ready files with defined stitch types, pull compensation, underlay, and color stops, plus careful hoop setup and thread color matching, ensures consistency across patches and batches.
How can a brand scale from prototype to large-scale production in patch production steps while preserving brand integrity?
To scale from prototype to large-scale production in the patch production steps, plan meticulously: finalize specs, forecast demand, manage lead times and capacity, and use standardized procedures. Close collaboration between design teams and manufacturing partners, supplier reliability, and ongoing testing protocols help preserve brand integrity and maintain quality at high volumes.
| Aspect | Key Points |
|---|---|
| Ideation and Concept |
|
| Design and Digitization |
|
| Material Selection for Patches |
|
| Prototyping and Sampling |
|
| The Patch Embroidery Process |
|
| Production Steps and Manufacturing Workflow |
|
| Quality Control for Patches |
|
| Scaling Up |
|
| Common Challenges and Solutions |
|
| Closing the Loop |
|
| Conclusion |
|
Summary
Table created summarizing key points of the base content in English.