
DIY vs Professional Custom Patches mark two distinct paths for personalizing apparel, gear, and branding, each with its own rhythm, requirements, and potential payoff, ranging from hands‑on experimentation to reliable, scalable results that support brand launches and fan communities. On the DIY side, you gain hands‑on control, the joy of creating something uniquely yours, and the flexibility to iterate designs instantly, but you trade speed and polish for a steeper learning curve, longer production times, more trial and error, and outcomes that can vary with technique, materials, and equipment. The professional route offers consistent stitching, precise color matching, durable backing options, and scalable production that make it ideal for teams, clubs, or merchandise programs, yet it often requires upfront artwork proofs, setup fees, minimum quantities, color matching assurances, and careful scheduling to meet deadlines. The choice also hinges on practical factors such as the fabric being decorated, the intended laundering environment, the frequency of wear, and how critical long‑term durability and brand fidelity are to the project’s success, with implications for warranty, repeat orders, and the costs of rebranding. In this introductory overview, we outline the core considerations, summarize common methods, and help you decide whether a DIY patch kit approach or a coordinated professional run best matches your clothing, gear, and branding goals while highlighting practical steps to start testing and budgeting.
Viewed through the lens of in‑house crafting versus outsourced insignias, the debate shifts from hands‑on technique to scalable production, and terminology begins to vary with audience intent. We can describe the at‑home option as a DIY patch kit project, while a business‑scale path might be framed as a professional patch program funded by a branding budget. Other terms, such as cost considerations for embroidery patches and the relative ease of iron‑on patches vs sew‑on patches in different fabrics, reflect common questions readers ask. By weaving in related concepts like custom patches for clothing, garment embellishment, and brand identifiers, you enhance semantic reach and guide readers toward practical comparisons. As you explore, consider how turn‑around, durability, and per‑patch pricing affect decisions, and take the next step with a clear brief and a short list of preferred options.
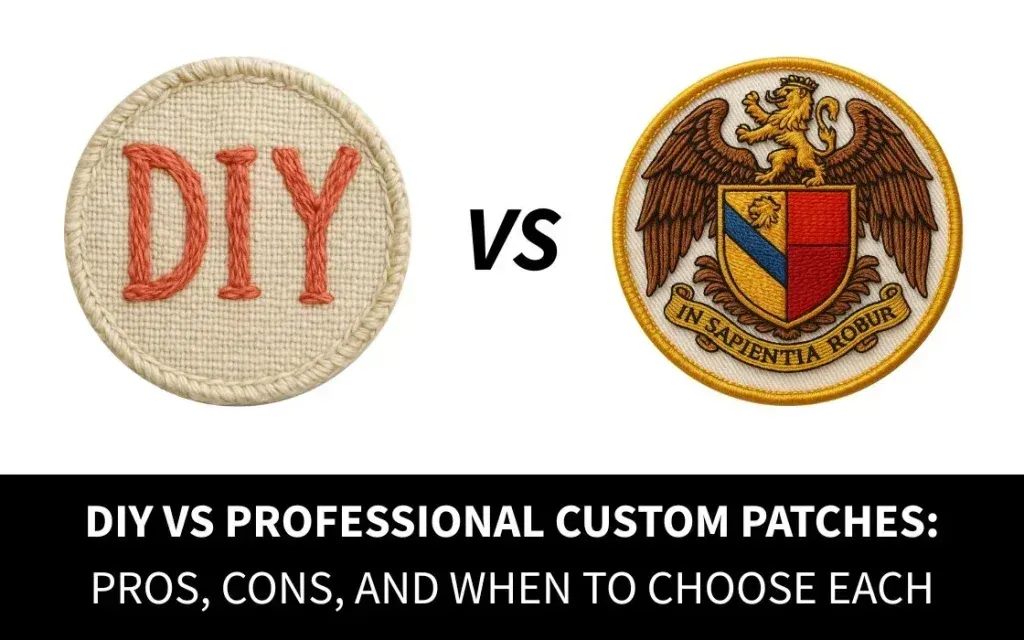
DIY Patch Projects: Getting Started with a DIY Patch Kit
Starting with a DIY patch kit puts hands-on customization within reach. A typical kit includes fabric patches, stabilizers, embroidery supplies, and the essential tools you need to begin experimenting with your own designs. For anyone exploring custom patches for clothing, a DIY patch kit offers a practical path to prototype ideas, test materials, and learn the basics of embroidery without committing to a full production run.
Beyond the basics, the kit’s components determine what you can achieve. Stabilizers help keep fabric flat during stitching, while embroidery threads and needles influence the finish and durability of each patch. This approach aligns with the broader goal of creating custom patches for clothing on your terms, using iron-on patches vs sew-on patches to evaluate adhesion, washability, and the overall look before moving to more advanced production methods.
Professional Custom Patches: Quality, Color, and Durability
Professional patches are produced on dedicated embroidery or weaving machinery designed to achieve precise detail and consistent texture. Embroidered patches are the most common, with woven patches offering finer detail at smaller sizes. This level of precision supports strong branding and reliable appearance across numerous items, including uniforms, merchandise, and team apparel.
Backings and finishes supplied by professional providers—such as iron-on, sew-on, or Velcro backs—are chosen to maximize durability and stay-on performance through repeated washing. The ability to reproduce complex logos, gradients, and tiny text with high fidelity makes professional patches especially suitable for custom patches for clothing that represent a brand or organization with a consistent, high-quality look.
DIY vs Professional Custom Patches: A Practical Decision Framework
Choosing between DIY and professional patches hinges on three core factors: quality expectations, budget, and timeline. If your priority is exploring ideas, learning the craft, and maintaining tight control over small-scale projects, DIY patches offer a flexible and cost-conscious starting point. This path also supports rapid iteration when refining your design before a larger commitment.
For brands, teams, or events requiring scalable, repeatable results, a professional run delivers consistency, speed, and reliable branding. The decision framework should compare the expected patch quality, the needed volume, and the time available for delivery, while also considering the potential savings or costs associated with professional patch costs and any necessary artwork proofs.
Cost Breakdown and Budgeting for Patch Projects
DIY patches generally center on kit costs and material expenses. A basic DIY patch kit with stabilizers and tools can range from $15 to $60, depending on quality and quantity. When you add fabrics, threads, and optional heat-press accessories, the upfront cost rises, but the per-patch expense can stay low for small runs.
Professional patches introduce different budgeting concerns. Per-patch costs often run from about $2 to $6 for small runs, with higher prices for more complex designs or premium materials. You’ll also encounter setup or artwork fees, lead times, and minimum order quantities that influence the overall project cost, especially if your goal is a limited but polished rollout.
Choosing Backings, Edges, and Finishes: Iron-on, Sew-on, and Merrow Details
Backings and edge finishing greatly influence durability and appearance. Iron-on patches are convenient but their performance depends on fabric type and washing conditions, while sew-on patches offer reliable adhesion without heat exposure. For professional patches, merrow borders and precise edge finishing create a crisp, durable look that remains consistent across batches.
Other backing options, such as Velcro backs for removable patches, can add versatility for teams or interchangeable branding. The choice between iron-on vs sew-on affects long-term wear, laundering, and user experience, making it essential to consider fabric compatibility and care instructions when planning a patch project.
Practical Tips for Designers and Brands: Custom Patches for Clothing
For designers aiming to scale a clothing line, preparing a clear design brief with vector artwork, color codes, and size specifications is essential. Provide proofs to confirm color accuracy and scale, and consider how patch dimensions will work with different garment silhouettes. This approach helps ensure that custom patches for clothing remain faithful to the brand across products.
Consistency is key when multiple patches represent the same logo or identity. Standardize patch shapes, borders, and color palettes, and plan for testing across materials and laundering scenarios. Whether you start with a DIY patch kit for prototypes or commission a professional run for a polished rollout, alignment on branding details will save time and maintain quality across all items.
Closing Note: Aligning Patch Choices with Goals
In sum, DIY patches offer hands-on learning, cost control for small projects, and rapid iteration, while professional patches provide reliable quality, durability, and brand fidelity at scale. By evaluating design complexity, budget, and timeline, you can select the path that best supports your goals, whether you’re patching clothing, bags, team uniforms, or public gear.
If you’re ready to move forward, start with a clear design brief, compare vendor timelines and backing options, and keep the target audience in mind. The right patch solution should balance quality expectations with budget constraints, ensuring a successful outcome for your next custom patches project.
Frequently Asked Questions
DIY patch kit vs Professional Custom Patches: what’s the practical difference for clothing and gear?
DIY patch kit options let you design and test patches at home, with lower upfront costs for small runs and plenty of room for experimentation. Professional Custom Patches deliver consistent embroidery or weaving, sharper color fidelity, and scalable production. For custom patches for clothing, start with a DIY patch kit for prototypes, then switch to professional patches when you need branding-level quality and reliability.
How do DIY patch kit costs compare to professional patch costs for small runs?
DIY patch kit costs are typically $15–$60 for the kit, plus standard materials, with many items reusable. For small runs, professional patch costs often range from about $2–$6 per patch, plus possible artwork or setup fees. If you value consistency and speed, professional patches may be worth the extra per-patch cost.
Iron-on patches vs sew-on patches: which is better for DIY patches, and how do professionals handle backing?
Iron-on patches are convenient for DIY projects but can peel on certain fabrics or with frequent washing. Sew-on patches are more durable, especially on thick fabrics. Professionals offer multiple backing options (iron-on, sew-on, Velcro) and polished finishes like merrow edges to ensure durability and branding fidelity.
What should I know about embroidery patches cost when choosing between DIY vs Professional Custom Patches?
Embroidery patches cost varies by method. DIY costs come from kit prices and materials and can be low for very small tests. Professional embroidery patches cost depends on size, detail, backing choice, and setup fees, with economies of scale improving as you order more patches for clothing lines.
What are the main pros and cons of DIY patches vs professional custom patches for clothing?
DIY patches offer cost control for tiny projects, learning value, and flexible experimentation, but they require time and may sacrifice durability and consistency. Professional patches provide consistent quality, higher durability, and scalable production but come with higher per-patch costs for small runs, longer lead times, and possible minimum orders.
Which path is best for a brand or team needing many patches: DIY patches or Professional Custom Patches?
For large quantities, professional Custom Patches are usually best due to branding fidelity, color and stitch consistency, and reliable turnaround. DIY patches can work for prototypes or limited launches, but ongoing branding with custom patches for clothing often benefits from professional production.
| Topic | DIY Patches – Key Points | Professional Custom Patches – Key Points |
|---|---|---|
| What options exist |
|
|
| Pros |
|
|
| Cons |
|
|
| Cost considerations |
|
|
| Quality considerations |
|
|
| Choosing the right path |
|
|
| Practical tips (DIY) |
|
|
Summary
Conclusion will follow in text.