
DIY patches have exploded from hobby rooms into everyday style, offering a quick, affordable, and highly personal way to refresh clothes. For beginners and seasoned crafters alike, DIY patches ideas can spark big style shifts without breaking the budget. Whether you’re updating a denim jacket or jazzing up a tote bag, learning how to sew patches, and exploring embroidery patch designs, can elevate your project. Using upcycled clothing patches not only personalizes garments but also supports sustainable fashion. This guide also offers an iron-on patches tutorial for quick transformations and longer-lasting sew-on options.
Beyond the phrase patches, this concept is often described as fabric embellishments, garment customization, or textile décor—terms that signal the same idea through related imagery. These descriptors cover decorative patches, fabric appliqués, or embroidery-inspired motifs that personalize a wardrobe with creativity and care. Using this broader language helps search engines connect the topic to related ideas like sustainable fashion, upcycling, and DIY sewing projects, while guiding readers to practical steps they can try.
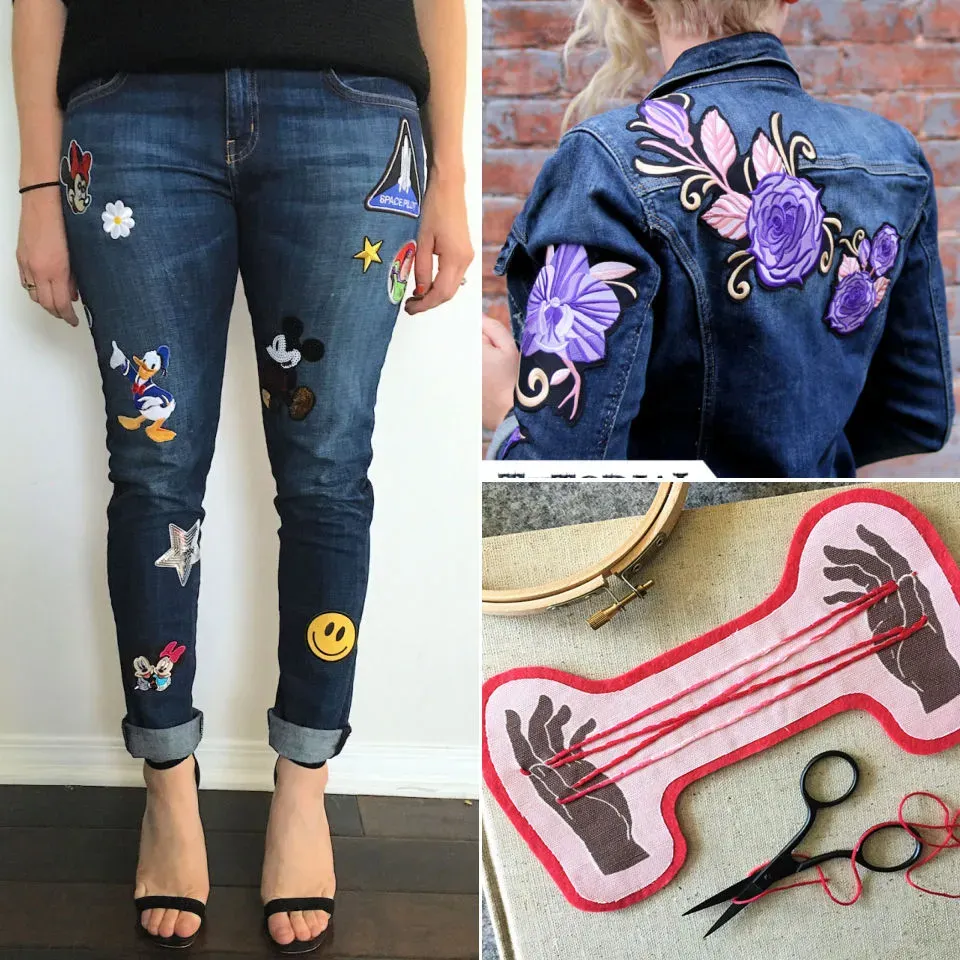
DIY Patches Ideas: Creative Starter Concepts
Getting started with DIY patches ideas means collecting small, symbolic motifs that express your interests. Think bold icons, playful shapes, or meaningful initials. Start by choosing a base color scheme that complements the garment and then mix textures—felt, denim scraps, and canvas—so the finished piece reads as intentional art rather than random patches.
To keep things approachable, sketch a few layouts on paper or use the garment as a guide. For upcycled clothing patches, pull fabric from old pieces with sentimental value and incorporate them into your clusters. This approach aligns with sustainable fashion and lets you tell your personal story through patchwork.
How to Sew Patches: Techniques for Durable Attachments
If you are learning how to sew patches, start with a simple running or zigzag stitch around the edge. Hand stitching can be meditative, while a sewing machine speeds up bigger projects. For tighter fabrics like denim or canvas, a dense stitch pattern creates a neat, durable edge.
Use a stabilizer under thin fabrics and consider backstitching at key anchor points to prevent edge fraying. Choose thread colors that either blend with the patch edge or provide a subtle contrast, and finish with a small backstitch or cross stitch to reinforce corners.
Embroidery Patch Designs: Crafting Texture and Personalization
Embroidery patch designs allow you to add texture and personalization beyond basic appliqués. Experiment with satin stitches, chain stitches, French knots, and shading to lend depth. When choosing embroidery patch designs, consider motifs that echo the base fabric or tell a story about your interests.
Combine machine and hand embroidery for a mixed media look. For patches that will be repeatedly washed, secure the embroidery with a stabilizer and test colors on a scrap before stitching onto the patch.
Upcycled Clothing Patches: Sustainably Refresh Your Wardrobe
Upcycled clothing patches celebrate resourcefulness and reduce waste. Scavenge fabric remnants from old garments to assemble a patchwork look that is unique and budget-friendly. This approach helps you create a wardrobe with a narrative, using textiles that would otherwise be discarded.
Start with a small cluster near a pocket or hemline, then expand as you gain confidence. Patches made from familiar fabrics—denim, tweed, or even vintage satin—bring cohesion and a story to your outfit while supporting sustainable fashion.
Iron-On Patches Tutorial: Quick Steps for a Secure Bond
Iron-on patches tutorial often appeals to beginners who want fast results. Check the patch instructions, preheat the iron, and test on a scrap to ensure the glue activates properly. Position the patch, cover with parchment, and press firmly for the recommended time.
To extend longevity, stitch around the edges after heat setting, especially on items that go through frequent washing. Iron-on patches tutorial supplies a reliable base, but adding a light stitch gives durability without sacrificing speed.
Patch Layout, Care, and Maintenance: Longevity Tips
Effective patch layout considers focal points, eye level placement, and garment structure. Try odd numbers for visual balance and make sure patches align with existing seams to reduce stress on the fabric.
Care for patched garments by turning inside out, washing cold, and avoiding high heat. If patches lift, resew edges or reapply heat with an additional press. Regular checks help ensure your DIY patches remain vibrant and secure.
Frequently Asked Questions
What are DIY patches and why are they popular?
DIY patches are fabric patches you apply to clothing to personalize or repair items. They’re popular because they’re affordable, quick, and let you tell your story. For DIY patches ideas, start by listing themes you love and choose patches that match your base piece.
What are some DIY patches ideas for beginners and how do I get started?
Great DIY patches ideas for beginners include small motifs (stars, initials), nature-inspired designs, or upcycled clothing patches from fabric scraps. Start by choosing a patch style, planning placement, and selecting an attachment method (sew-on, iron-on, or fusible).
How to sew patches on clothing: a quick guide?
Sew-on patches are durable for denim or canvas. Place the patch, pin it in place, and stitch around the edge with a straight or zigzag stitch about 1/8 to 1/4 inch from the edge. If the patch backing is thick, use a stabilizer and consider reinforcing with a second pass.
How can embroidery patch designs be used to customize DIY patches?
Embroidery patch designs add texture and personalization. Hoop the fabric, outline the edges with backstitch, and fill with stitches such as satin stitch, seed stitch, or French knots. Combine embroidery designs with patch shapes for a unique, handcrafted look.
What is the best approach for upcycled clothing patches and sustainable fashion?
For upcycled clothing patches, repurpose fabric from old garments or scraps and mix with new patches for a cohesive look. Plan color themes, layer textures, and arrange patches thoughtfully to extend the life of your wardrobe while supporting sustainable fashion.
Is there an iron-on patches tutorial or tips for beginners in the DIY patches guide?
Yes, an iron-on patches tutorial can help you get started quickly. Preheat the iron (no steam), place parchment over the patch, and press according to the patch instructions for the recommended time. Let cool, then optionally stitch around the edge for extra security; note that natural fibers tend to hold iron-ons best.
| Aspect | Key Points |
|---|---|
| What are DIY patches? |
|
| Why patches matter? |
|
| Getting started: Materials you’ll need |
|
| Choosing patches and design ideas |
|
| Patch placement and arrangement ideas |
|
| Upcycling and sustainability with patches |
|
| Step-by-step project: customize a denim jacket |
|
| Care and maintenance for patched garments |
|
| Troubleshooting common issues |
|
| Embroidery patch designs and where to find them |
|
| Iron-on patches tutorial: a quick refresher |
|
| Inspiration and next steps |
|
Summary
DIY patches open a world of self-expression by turning everyday garments into personalized statements. Whether you’re learning how to sew patches, experimenting with embroidery patch designs, or exploring upcycled clothing patches, this guide covers DIY patches ideas, iron-on patches tutorial, and practical steps to refresh your wardrobe. Start small, experiment, and build a collection of one-of-a-kind pieces that celebrate creativity and responsible fashion.