
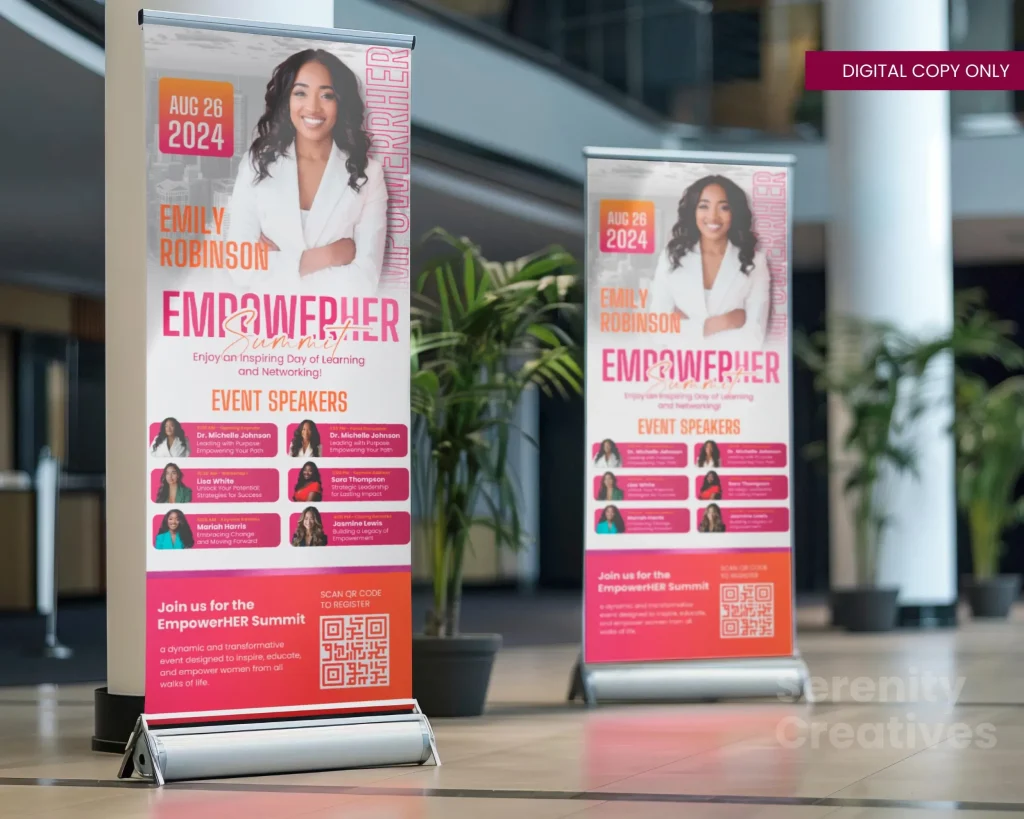
Custom banner for events instantly sets the tone, drawing attendees toward your booth with bold visuals and clear messaging. In a crowded venue, a banner that is legible from a distance and aligned with your branding can be the difference between a pass and a conversation. This guide shares practical tips on layout, materials, and production to keep your banner durable and eye-catching. From choosing the right size to placing it for maximum impact, the process is about clarity, contrast, and concise copy. For those looking to optimize their print runs, consider strategies that support strong event branding, such as event banner design.
From a broader perspective, banners can function as promotional signage for gatherings, creating a cohesive presence across the venue. They act as guideposts, directing attendees from entry points to your booth and reinforcing your brand at a glance. Think in terms of venue signage and exhibit graphics, coordinating colors, typography, and messaging for a unified experience. For outdoor event banners, durability matters, so choose weather-ready materials and secure mounting that keeps text readable in wind and sun. With this mindset, you can align your banner strategy with the overall event flow and drive meaningful engagement.
Custom banners for events: Designing booth signage that grabs attention
A Custom banner for events serves as the front door to your brand in any venue. It communicates your core message, brand values, and value proposition within seconds, guiding attendees toward your booth or stage. Because event visitors scan surfaces quickly, your banner must be instantly legible and visually cohesive with other signage. When you start with a clear objective—whether to drive signups, promote a keynote, or identify a sponsor—a Custom banner for events can anchor your presence and set expectations.
Think of it as an invitation. The best banners combine strong typography, sharp imagery, and brand-aligned colors to create contrast that reads from distance. Keep the copy concise: a headline, a supporting line, and a simple call to action. By testing readability from several angles and distances, you ensure your banner works in busy aisles, near entrances, and under varied lighting.
Event banner design essentials: typography, color, and layout that convert
At the core of event banner design is typography. Choose high-contrast color combinations and font sizes that remain legible from 10–15 feet away. Limit yourself to two or three typefaces and use bold weights for headlines while keeping body text lighter. A clear typographic hierarchy helps attendees grasp the value proposition in moments.
Color and branding reinforce recognition. Use your primary brand color to emphasize the message and a secondary color for supporting information. Ensure the design aligns with overall brand guidelines and remains accessible, avoiding color-only cues that colorblind audiences might miss. A clean layout with a defined visual flow—headline at the top or upper left, supporting copy beneath, and a conspicuous CTA—improves engagement.
Materials, finishes, and production considerations for banner printing for events
Selecting the right material impacts durability and appearance for banner printing for events. Vinyl banners are standard for indoor and outdoor use and can withstand rain and sun, especially with reinforced edges. Mesh banners offer wind-through capability ideal for outdoor settings, while fabric banners provide vivid color and a premium feel for indoor stages. Finish options like gloss or matte coatings influence glare and readability.
Communication with the printer matters. Coordinate color management with ICC profiles, request proofs, and confirm finishing details such as hemming, eyelets, or pole pockets. Laminates can protect against wear, but a matte finish may improve legibility in bright light. Proper color calibration and proofing help ensure your brand colors render correctly when you print large banners for events.
Sizing, placement, and installation for outdoor event banners
Outdoor event banners require robust sizing and placement to maximize visibility. Common outdoor sizes include 3×6 feet, 4×8 feet, and larger formats for pavilion walls or entryways. Plan for wind loads and choose materials and hardware that resist tearing, such as reinforced corners and grommets. Position banners at eye level along primary traffic flows to guide attendees toward your booth or session.
Installation strategies should consider venue constraints and weather. Use stand-alone frames, retractable banners, or wall mounting depending on space. Create a read path from one banner to another whenever possible, so attendees can follow a visual journey. Always have backups in case of equipment failure or sudden weather changes.
Content strategy for banners: messaging, branding, and calls to action
A strong content strategy starts with a clear value proposition and a headline that grabs attention. The banner should reflect your branding—the logo, brand colors, and a short line that communicates why attendees should engage. For ongoing campaigns, this is where event banner design comes into play, ensuring the message remains concise and impactful, not cluttered by extraneous details.
CTA placement matters. Include a simple next step such as a booth number, QR code, or session sign-up. If space allows, add a supporting line that reinforces your offer; avoid dense lists that slow recognition. If you work with sponsors, assign a dedicated strip that’s visually separate from the main message to prevent dilution of your call to action.
Budget, timelines, and production workflow for professional banners
Budgeting for banners involves size, material, print quality, and timing. Costs scale with material choices—vinyl, mesh, or fabric—and with finishing options such as lamination and hardware. Lead times include proof approvals, production, and shipping, so plan accordingly and consider rush options if your event date is tight. For many events, investing in professional banner printing for events gives you color accuracy, durability, and installation support that DIY setups can’t match.
A practical workflow helps you stay on track: define objectives, gather assets, select material and size, draft the design, request proofs, approve, print, and install. For larger or higher-visibility events, rely on a vendor who can provide proofs, installation hardware, and on-site support. Even with a DIY option, create a contingency plan and keep a backup banner ready to deploy in case of damage or weather challenges.
Frequently Asked Questions
What are the key considerations when designing a Custom banner for events?
Key considerations include legibility from a distance, strong typography, color contrast, concise copy, brand alignment, and a clear CTA. Choose materials (vinyl, mesh, or fabric) based on indoor vs outdoor use and expected wind. Use a simple layout with a single value proposition and a logo, and ensure the banner size and installation method suit the venue.
How does event banner design affect readability and engagement for a Custom banner for events?
Event banner design should prioritize readability, audience context, and brand consistency. Use high-contrast colors, two to three typefaces max, and a large, prominent headline. Ensure the core message is communicated within seconds and include a visible CTA or QR code. Consider lighting, distance, and traffic flow to guide where attendees look.
Which materials are best for banner printing for events and how do I decide between vinyl, mesh, or fabric?
For banner printing for events, vinyl offers durability for outdoor use, mesh reduces wind resistance, and fabric provides vibrant color with a premium feel. Choose based on where the banner will be displayed, expected wind or crowd movement, and the installation method. Consider finishes like lamination or edge reinforcements to extend life and ease mounting.
What content should you include on an outdoor event banner to optimize a Custom banners for events?
Include your logo in a high-contrast area, a concise value proposition as the headline, and event details if relevant. Add a clear call to action, such as a booth number or QR code, and keep sponsors in a separate, non-competing strip if applicable. Keep copy minimal and ensure the design supports quick scanning by passing attendees.
What sizes work best for indoor and outdoor banners in event banner design, and how should you place a Custom banner for events?
Indoor banners typically use sizes like 2×4 ft, 3×5 ft, or 4×6 ft; outdoor banners commonly use 3×6 ft, 4×8 ft, or larger like 6×10 ft. Place banners at eye level along primary traffic flows, near entrances, and use reinforcement hardware (grommets, pole pockets) for secure mounting. Use grid-based layouts and generous margins so the message remains clear from different angles.
How long does banner printing for events take, and should you request proofs for your Custom banner for events?
Production timelines depend on size and material, but plan for proofs, color checks, and potential rush fees. Request soft proofs and, if possible, a live color proof to verify accuracy before full production. Allocate time for printing, finishing (lamination, hemming), shipping, and on-site installation, including weather contingency when applicable.
| Aspect | Key Points |
|---|---|
| Purpose and Value |
|
| Audience & Readability |
|
| Design Principles |
|
| Materials & Production |
|
| Sizing, Placement & Installation |
|
| Content Strategy |
|
| Budget, Timeline & Production Workflow |
|
| DIY vs Professional |
|
| Step-by-step Process |
|
Summary
Custom banner for events is a powerful, cost-effective tool to attract attention, communicate your brand’s value, and drive engagement at any venue. This banner type should be legible at distance, aligned with your brand guidelines, and designed with placement and audience in mind. Focus on clear typography, concise messaging, and a strong call to action, while selecting durable materials suited to indoor or outdoor use. Plan for production timelines, proofs, and installation logistics to ensure a smooth, impactful presence, whether you’re at a conference, trade show, festival, or corporate gathering. When integrated with your event strategy, banners become a strategic asset that helps attendees understand who you are, what you offer, and how to engage further.