
Iron-On patches vs Sew-On patches present two distinct approaches to decorating and repairing fabrics, each with its own strengths. This guide also answers How to apply iron-on patches and helps you weigh ease of use against durability. Sew-on patches pros and cons are explored to show where stitching outperforms heat adhesives. We compare durability, including the Durability of iron-on patches, and discuss Best fabrics for iron-on patches for reliable results. Whether you favor a quick, smooth finish or a long-lasting option, this overview helps you choose the right method.
To frame this with alternative terminology, adhesive-backed patches versus stitched-on designs describe two paths for customizing and repairing fabrics. From an LSI perspective, you connect ideas such as heat-activated bonding, edge stitching, wash resistance, and fabric compatibility to the central comparison. This second paragraph introduces the topic using related terms like fabric patches, patch application methods, and wear testing to support the main discussion. Presenting the comparison through these related concepts helps readers discover the same ideas through different search queries while keeping the focus on when to glue on versus sew on patches.
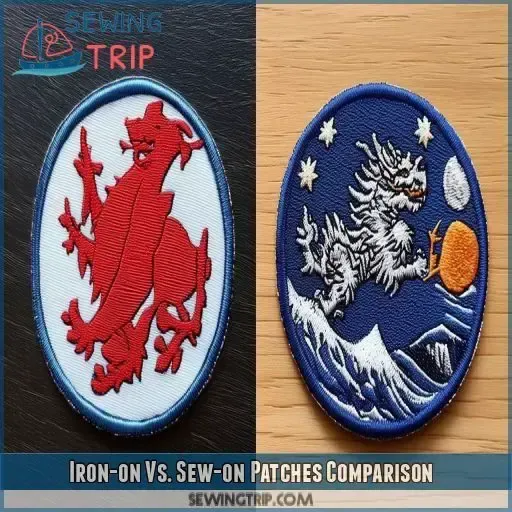
Iron-On vs Sew-On Patches: Quick Comparison for Deciding Your Method
Choosing between iron-on and sew-on patches comes down to balance between speed and longevity. Iron-on patches offer fast decoration and temporary fixes, with heat-activated adhesives that bond under an iron’s pressure. Sew-on patches require stitching, producing a more durable reinforcement that can withstand heavy use and frequent washing. Each method has distinct strengths, and the right choice depends on fabric type, expected wear, and maintenance preferences.
Consider fabric behavior, the garment’s location, and typical care routines. On stiff fabrics like denim or canvas, iron-on patches often perform well, while knits and stretch fabrics respond better to sew-on patches. For a quick, clean look on a backpack or jeans, iron-on can be ideal, but for items that go through rough washing or stretch, sewing edges add a safety margin. This ties into the idea of how to apply iron-on patches and understanding sew-on patches vs iron-on patches.
Best Fabrics for Iron-On Patches: What Works and What Breaks the Bond
Denim, canvas, and cotton twill are widely recommended because their dense weave provides a stable substrate for the heat-activated adhesive. When properly applied, these ‘Best fabrics for iron-on patches’ deliver a strong bond that lasts through many washes, with minimal edge peel when followed by the correct pressing technique.
Avoid or proceed with caution on stretch fabrics, lightweight knits, leather, and faux leather where adhesives may fail or peel as the fabric moves or flexes. If you must work with leather, look for patches designed specifically for leather and follow the manufacturer’s heating guidance. For stretch garments, sew-on patches tend to offer superior security.
Durability and Washability: How Long Iron-On Patches Last
Iron-on patches can be quick but can lose adhesion with repeated wash cycles and high-heat drying. The durability of iron-on patches is influenced by fabric type, patch quality, and care practices, including washing inside out and avoiding high heat in dryers.
Sew-on patches generally tolerate washing better and keep edge integrity even after many cycles. If stitching begins to loosen, re-stitching is usually easier than re-adhering an iron-on patch. Consider reinforcing the border with extra stitches to extend life.
How to Apply Iron-On Patches: Step-By-Step for Strong Bonds
Before applying, test a small area to verify the fabric responds to heat. Position the patch, then cover with a pressing cloth and apply firm, steady heat for the recommended time (usually 15-30 seconds). Ensure the edges bond fully before moving the patch.
If a corner lifts, re-apply heat or add a second application. Allow the fabric to cool completely before handling, then gently tug the edges to test adhesion. For tricky fabrics, you can reinforce with a small dab of fabric glue on the back edge after cooling, though this is optional.
Sew-On Patches Pros and Cons: When Stitching Is the Best Choice
Sew-on patches provide a reliable attachment that survives frequent washing and fabric movement. They are especially effective on knit fabrics and items that experience flexing, where heat-activated adhesives may fail.
However, sewing takes more time and skill. A tight running stitch or small zigzag around the edge, plus edge reinforcement, yields long-lasting results. If you need a balance of speed and durability, a mixed approach—initial iron-on placement followed by sewing along the border—can offer the best of both worlds.
Choosing Between Iron-On and Sew-On for Common Garments
For backpacks, denim jackets, or canvas totes, iron-on patches can provide a quick, flat look and a simple way to decorate or repair without needles. They are especially appealing when you want to avoid sewing and can work well for temporary designs.
For items that endure heavy washing or stretch, sew-on patches are often the safer bet. You can also combine methods—start with iron-on for quick placement and then reinforce with sewing along the border for long-lasting results. This approach aligns with the concept of sew-on patches vs iron-on patches and helps tailor the method to each project.
Frequently Asked Questions
What is the main difference between iron-on patches vs sew-on patches in terms of durability and everyday wear?
Sew-on patches tend to be more durable over time and hold up well to washing and fabric movement. Iron-on patches can peel or lift after heat, friction, or repeated washing. For heavy-use items, sewing is usually the safer choice; weigh the sew-on patches pros and cons and the durability of iron-on patches when deciding.
How to apply iron-on patches?
Steps: test a small area, position the patch, cover with a thin cloth, apply firm heat with an iron (usually cotton setting, no steam) for 15–30 seconds, press edges to bond, let it cool completely, then gently tug to test the bond. If it lifts, re-press or reapply as needed. This follows the guidance on how to apply iron-on patches.
Which fabrics are best for iron-on patches?
Best fabrics for iron-on patches include denim, canvas, and cotton twill, which hold heat-activated adhesives well. Avoid stretch fabrics or lightweight knits where the adhesive may fail. Leather or faux leather requires patches designed for that material and careful application; for stretch fabrics, sew-on patches are often safer.
What are the pros and cons of sew-on patches vs iron-on patches?
Sew-on patches offer long-term durability and washability, especially on tough or moving fabrics. Iron-on patches provide quick, easy application but may require reattachment after washing or heat exposure. When choosing, consider the sew-on patches pros and cons alongside the durability of iron-on patches.
Are sew-on patches safer on knit or stretch fabrics than iron-on patches?
Yes. Sew-on patches are generally safer on knit and stretch fabrics because they don’t rely on heat-activated adhesives that can fail with fabric movement. Iron-on patches can peel or distort on stretches, so for knits, sewing tends to be the better option.
Can you mix iron-on and sew-on patches to maximize durability?
Yes. You can start with iron-on patches for quick placement and reinforce the edges with sewing along the border. This approach combines the speed of iron-ons with the added durability of sewing, aligning with the idea of Sew-on patches vs iron-on patches for optimal results.
| Topic | Iron-On Patches | Sew-On Patches |
|---|---|---|
| What they are | Backed with an adhesive that bonds to fabric when heat is applied; typically used on non-stretch fabrics like denim, canvas. | Patches secured by stitching around the edge; works on most fabrics including knits and denim. |
| How they work | Heat activates the adhesive; bond forms during ironing; commonly 15–30 seconds per patch. | Stitches around the edge provide a durable, washable attachment. |
| Durability | Usually less durable over time; can peel with heat/friction; shorter lifespan with frequent washing/heat exposure. | Generally more durable over time; withstands washing and fabric movement better. |
| Appearance | Sits flush on flat fabrics; may be less visible stitching. | Can be dimensional with visible stitching around the border. |
| Fabric compatibility | Best on stiff/non-stretch fabrics; stretch can cause peeling. | Safe on most fabrics, including knits and denim. |
| Time and effort | Faster to apply but may require re-application later. | Takes more time upfront but often lasts longer. |
| How to apply (steps) | Test a small area; place patch; cover with thin cloth; apply heat with a hot iron for 15–30 seconds; ensure edges bond; re-apply heat if needed; cool completely; test bond. | Pin patch; stitch around edge with tight running or small zigzag stitch; backstitch/whip stitch for security; reinforce with 10–12 stitches per inch around border. |
| Care & maintenance | Vulnerable to high heat; wash inside out in cold/warm water; avoid high-heat drying; re-press as needed; may require re-adhesion. | Tolerates machine washing better; less heat-sensitive but depends on stitching integrity; re-stitch if loosened. |
| Best uses | Quick, flat designs; good for non-stretch fabrics; suitable for temporary or decorative designs. | Heavy use, frequent washing, stretch fabrics; longer-lasting repairs; suitable for backpacks, jackets, denims. |