
Mastering a custom roll-up banner design begins with clarity, bold visuals, and a strategy that blends brand identity with a concise, benefit-focused message that speaks to attendees within seconds. From color choices to typography, this approach aligns with best practices that keep your message legible from across a busy tradeshow floor. A well-constructed plan uses a simple, scalable layout and a clear visual hierarchy to guide the eye toward the most important point, while leaving space for logos, a quick URL, and a compelling benefit that resonates at a glance. Early decisions on roll-up dimensions, safe zones, and bleed prevent content from being cropped and ensure high-quality output at distance, supporting durable performance across venues, lighting conditions, and crowd density. For production, export with print-ready banner design specifications, including correct color profiles and embedded fonts, to smooth the path to print, reduce reprints, and guarantee consistent results across multiple banners used in the same campaign.
Beyond the exact term ‘custom roll-up banner design,’ think of this project as a portable display or pull-up banner that captures attention in seconds. Alternative phrases like display stand graphics, trade-show signage, or event signage describe the same idea and help your content resonate with diverse audiences. LSI-friendly concepts include brand-friendly visuals, legible typography from a distance, and durable materials that withstand travel, setup, and lighting conditions. This broader framing also aligns with general marketing display best practices, ensuring the asset remains versatile across venues, formats, and campaigns. In practice, teams often translate the idea into ready-to-print assets and modular templates that support consistent branding while adapting to different roll-up sizes.
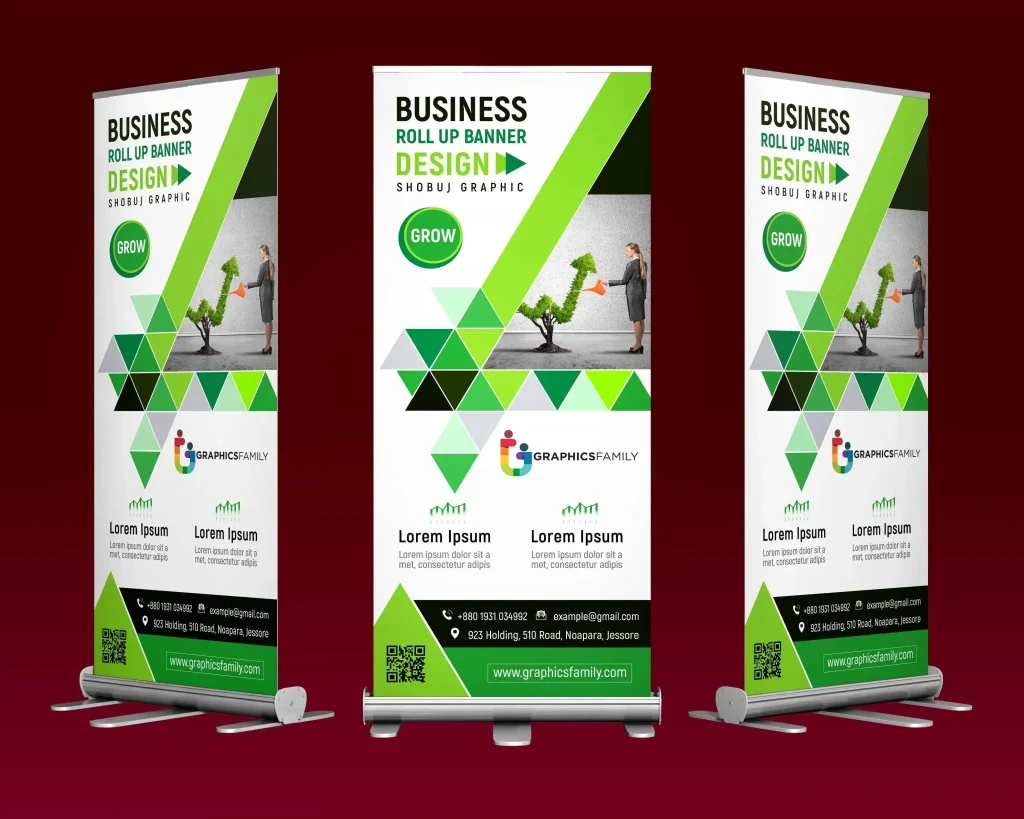
1) Custom Roll-Up Banner Design: Defining Purpose and Audience for Maximum Impact
Clarifying the purpose and audience is the first step in a successful custom roll-up banner design. By defining whether you’re aiming to generate leads, drive event attendance, or reinforce brand recognition, you set the direction for imagery, copy, and the overall layout. Understanding the audience—attendees, trade show visitors, or decision-makers—helps tailor wording, visual cues, and the key benefit you want to communicate at a glance.
Translate that purpose into a design checklist: pick a bold headline, select supporting copy, and identify the single strongest call-to-action. When aligned with a banner design checklist, this approach keeps elements purposeful rather than decorative and ensures the roll-up banner design remains effective in busy environments. This foundation also supports creating a print-ready banner design that printers can reproduce with color fidelity and sharp details.
2) Roll-Up Dimensions and Layout: Choosing the Right Size for Effective Design
Roll-up dimensions dictate how your message is arranged and read from different distances. Start by selecting standard sizes that fit your display space and booth footprint, then consider orientation—wide banners for backdrops or taller formats for narrow aisles. The roll-up dimensions you choose will guide typography scale, image placement, and the balance between headline and supporting copy in the context of a print-ready banner design.
Plan for production realities by accounting for bleed, safe zones, stand width, and any fold lines. A well-planned layout avoids important content being trimmed and preserves readability when the banner is viewed from several feet away. By aligning the roll-up dimensions with your banner design checklist and print-ready requirements, you ensure consistent results across multiple banners for events and venues.
3) Visual Hierarchy and Typography in Banner Design
Creating a strong visual hierarchy is central to both custom roll-up banner design and general banner success. Lead with a highly legible, attention-grabbing headline at distance, followed by a concise supporting line and a clear call-to-action. In the language of banner design, typography choices and spacing establish the first impression and reinforce your brand message even in noisy environments.
Choose a cohesive set of typefaces—often one for headlines and one for body text—and maintain consistent margins so elements breathe. This careful typography approach supports print-ready banner design, ensuring sharp type at large sizes and legible copy when scaled to different display formats. When combined with a strong visual hierarchy, your banner design checklist becomes a practical framework for consistent results.
4) Branding, Imagery, and Color Strategy for Roll-Up Banner Design
Brand-aligned imagery and color reinforce trust and recognition in roll-up banner design. Select high-quality photos or vector graphics that reflect your brand aesthetic and avoid visuals that clutter or confuse the message. The imagery should scale cleanly at banner size and align with your custom banner design goals, enhancing recognition rather than distraction.
Color decisions should respect contrast, accessibility, and brand guidelines. Limiting the palette to a small number of hues helps maintain cohesion when multiple banners appear together at events. This color strategy supports a robust banner design checklist and ensures your print-ready banner design remains legible under varied lighting conditions.
5) Copywriting and Call-to-Action: Clear Messaging for Print-Ready Banners
Copy length and clarity are critical for effective roll-up banner design. Craft a headline that communicates a core benefit in one compelling sentence, with a brief subhead that adds context. A straightforward call-to-action—such as a URL or QR code—should be easy to spot from several feet away, ensuring the banner performs even in crowded spaces.
Frame your copy around the reader’s questions: what’s in it for me, and how can I learn more? This user-centric approach aligns with the banner design checklist and helps produce a print-ready banner design that converts attention into action. Keep sentences short, words simple, and avoid paragraph-length blocks of text that slow scanning in a busy exhibit hall.
6) Production, Proofing, and Accessibility: From Design Checklist to Print-Ready Roll-Up Banner
From design to production, the path to a print-ready roll-up banner starts with a solid banner design checklist. Specify technical details such as 300 dpi resolution, CMYK color mode, and preferred file format to ensure the final print matches your intent. Understanding print-ready banner design requirements early reduces revision cycles and guarantees color fidelity.
Finally, rigorous proofing and accessibility checks complete the process. Review spelling, alignment, and image sharpness, and test readability at the expected viewing distance. Consider accessibility factors like color contrast and alternative text for scannable elements to broaden reach and ensure your custom roll-up banner design performs for everyone.
Frequently Asked Questions
What is custom roll-up banner design and how does it impact event results?
Custom roll-up banner design combines branding, layout, and print-ready considerations to create a portable, high-visibility banner. It emphasizes clear objectives, the right roll-up dimensions, strong visual hierarchy, and an effective call-to-action, all guided by a banner design checklist to improve engagement and brand impact.
What are standard roll-up dimensions, and how should they influence your custom banner design?
Standard roll-up dimensions define the available space and safe areas. Start by mapping the roll-up dimensions, plan typography and imagery within those bounds, and account for bleed and stand width to ensure a print-ready banner design looks great from a distance.
What elements should a banner design checklist include for a strong custom roll-up banner design?
A solid banner design checklist covers purpose and audience, visual hierarchy, typography, color and contrast, imagery, copy length and CTA, accessibility, print specs, and a thorough proofing process—supporting a robust print-ready banner design and a cohesive custom roll-up banner design.
How do you ensure your design is print-ready for roll-up banners?
Prepare print-ready files at 300 dpi in CMYK with appropriate bleed and safety margins, embed fonts, and save in a printer-friendly format (PDF or TIFF). Organize layers so logos, text, and backgrounds are clear to the printer, aligning with print-ready banner design and your custom roll-up banner design workflow.
What role do color, contrast, and brand consistency play in a successful custom roll-up banner design?
Color should reflect your brand palette (typically 2–4 colors) with strong contrast for legibility in varied lighting. Consistent color usage across banners reinforces identity, a core principle in both custom roll-up banner design and print-ready banner design.
How can typography and layout improve readability at distance in a custom roll-up banner design?
Use a clear visual hierarchy: a large bold headline, a concise supporting line, and minimal body text. Choose legible typefaces, set appropriate sizes for viewing distance, and maintain generous margins to ensure readability, a fundamental practice in custom roll-up banner design and the banner design checklist.
| Key Point | Summary |
|---|---|
| 1. Define purpose and audience},{ | Clarify goal (leads, event, branding) and identify attendees to guide messaging and visuals. |
| 2. Determine roll-up dimensions and layout | Choose sizes suitable for display space, account for the stand, bleed, and safe area; plan typography and imagery around the dimensions. |
| 3. Create a strong visual hierarchy | Establish priority with a bold headline, supporting line, and a clear CTA; use a display font for headlines and a sans-serif for body; ensure generous spacing. |
| 4. Align imagery with brand and message | Use high-quality, on-brand visuals; avoid clutter; ensure imagery remains sharp and relevant at print size and viewing distance. |
| 5. Color, contrast, and brand consistency | Apply the brand palette, ensure text-background contrast for readability, and limit to 2–4 colors for cohesion. |
| 6. Copy length, clarity, and call-to-action | Keep copy concise with a single clear benefit in the headline and a visible CTA (QR code, URL) legible from several feet away. |
| 7. Typography and readability at distance | Choose legible fonts, avoid overly decorative body copy, size appropriately, and use one font for headlines and one for body (third if needed). |
| 8. Hierarchy of content and messaging flow | Lead with the most persuasive benefit, then support details, then the CTA; align elements with a grid to reduce cognitive load. |
| 9. Print specifications and file readiness | Prepare print-ready files: 300 dpi, CMYK, PDFs/TIFs with embedded fonts; include bleed and safety; organize layers for printers. |
| 10. Material choice and durability | Choose vinyl, fabric, or laminate based on reuse and transport needs; consider lighting and finish for color vibrancy and longevity. |
| 11. Accessibility considerations | Ensure color contrast, readable font sizes, and clear messaging; include alt-text for QR codes or scannable elements. |
| 12. Proofing, revisions, and quality control | Thoroughly proof for spelling, image quality, and alignment; simulate in-context viewing to prevent costly reprints. |
| 13. Case studies and practical examples | Use real-world examples to illustrate impact and inform improvements for future banners. |
| 14. Final checklist integration and future-proofing | Create modular templates with bleed/safe zones; plan for evolution to reduce lead times and maintain consistency. |
Summary
Custom roll-up banner design is a strategic craft that distills your message into a single, high-impact visual within a compact display space. This descriptive overview highlights how purpose, dimensions, hierarchy, imagery, color, copy, typography, and print-ready execution come together to create banners that grab attention, communicate value quickly, and support your brand at events. By following a thoughtful banner design checklist—focusing on clear goals, proper roll-up dimensions, legibility from distance, brand-consistent visuals, and accessible, print-ready files—you can deliver consistent, measurable impact across trade shows, conferences, and retail displays. In short, effective custom roll-up banner design blends clarity, consistency, and practicality to maximize engagement and return on investment.